
Double check that you have set the clock source to external by using the front panel SAMPLE RATE switch, press it until it is flashing green. This selects external clock mode and the unit is ready to accept an incoming clock source via the BNC input.
From here, double check your master clock source, and ensure it is connected via a 75Ω BNC coaxial cable to the ASP800 BNC word-clock input. Providing that you have a valid clock source, ASP800 should sync to it without issue and the SAMPLE RATE led in the switch will turn to solid illumination. This shows that the unit is locked.
If you experience pops & clicks - double check any master/slave device configurations and cabling. A system should only have one master clock.
There are multiple ways that a ASP800 can interface digitally with other devices depending your needs. These can be seen below.
Directly into an Audio Interface
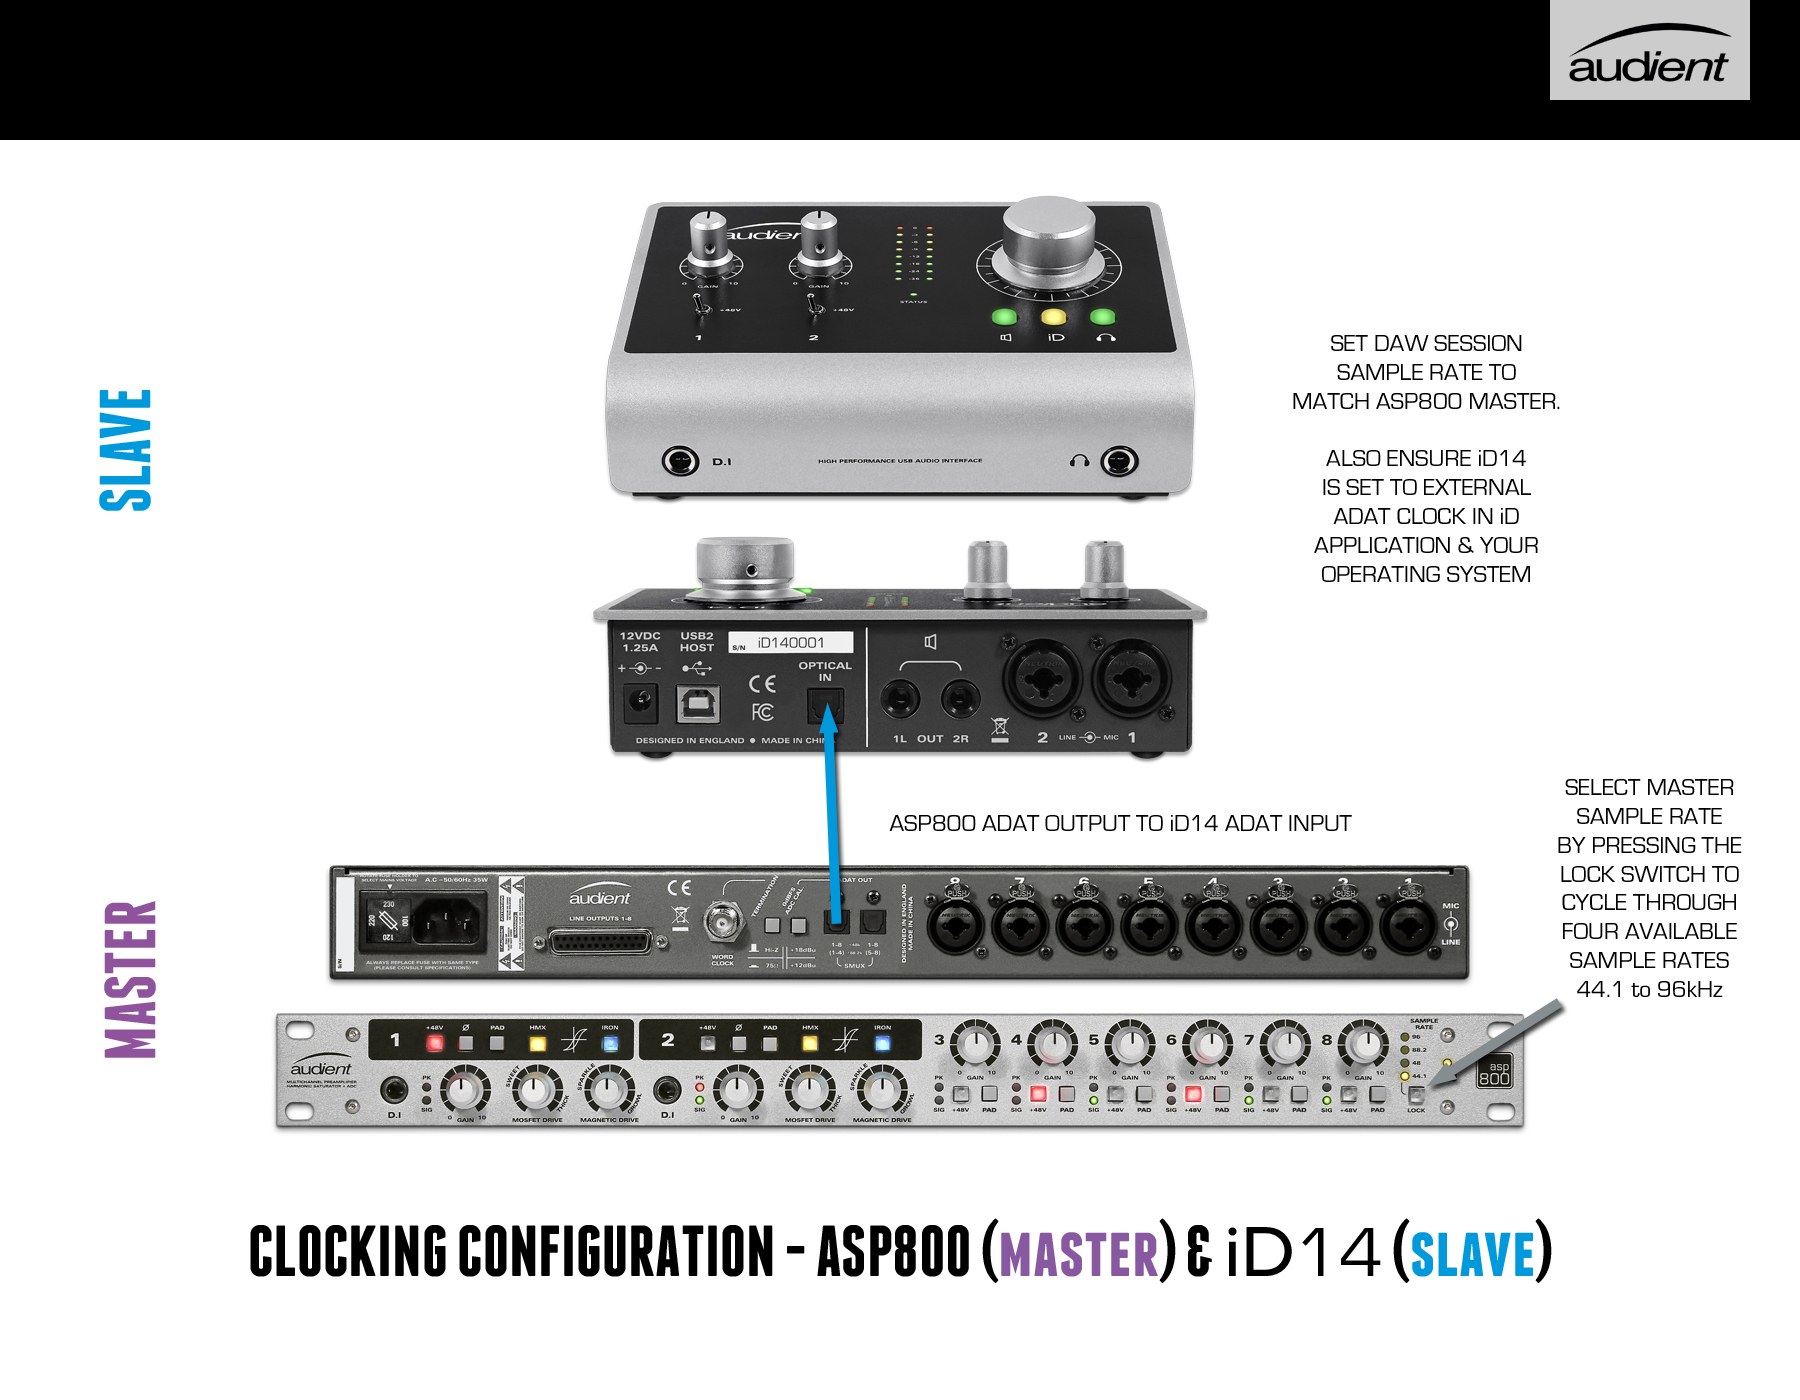
If you are using the ASP800 to digitally expand an audio interface, such as our iD22 and iD14 then you will use the ASP800 as the Master Clock and the interface as the Slave all connected via ADAT. Make sure that the interface is set to receive the clock from an external source
As a Slave with an Interface such as the UA Apollo
In this configuration you would connect the ASP800 to the other device using a BNC cable to transmit the word clock from the interface to the ASP800. The 75 Ohm termination switch must be pressed on the ASP800.
Then you would connect the ASP800 to the interface using Optical TOSLINK cables. Using two of these allows you to transmit all 8 channels at 88.2Khz and 96Khz sample rates. Next, you press the Sample rate button on the from of the unit until the button is flashing green. Once the flashing becomes a steady green the two devices are clocked. You are then ready to record.

Using Multiple ASP800 units with an Audio Interface.
There are two methods of connecting multiple ASP800s to a audio interface. Firstly, you can daisy chain two ASP800's together using BNC leads. To do this you would need a BNC T connector. This would plug into the first ASP800, making sure that the 75 Ohm termination switch isn't pressed in. You would then plug one BNC lead from your interface to the T connector. Next you would plug the a BNC lead into the other side of the T connector into the second ASP800. On the second ASP800 you need to ensure that the 75 Ohm Termination switch IS pressed in. You would then connect both ASP800s to the the audio interface using optical TOSLINK cables. (please note that the interface you are plugging into must have at least two ADAT inputs)
You would press the sample rate button on both ASP800s until the button flashed green. Once the Flashing becomes a solid light you are ready to record.

You can also use an master word clock unit (like the one found in the Antelope Orion) to clock all the devices using a BNC lead connected to each ASP800. The rest of the set up is then similar to using a daisy chain but a T connector isn't needed.

Related Articles: